Bake Along # 33 – Garlic Cheese Rolls with surprise(s)
February 26, 2020 2021-09-04 18:17Bake Along # 33 – Garlic Cheese Rolls with surprise(s)
Surprise(s)??!?
Some time back when I was running out of ideas for sending lunch boxes for my kids, one of my friend suggested me make garlic rolls. I was like what is that!? She told me, it doesn’t need any accompaniment and it just disappears in minutes while its hot. I was skeptical to try that. Yes, Yeastophobia!! Finally I gave it a try one day and that was forever my garlic rolls recipe. So when something gets very comfortable, behaves very forgiving I use it again and again. Everytime I have kids workshop, I make this. I mean not me, kids knead the dough and make their rolls and take home, that glee and satisfaction. So when kids are making it, you know how easy that thing has to be. And after climbing few steps with yeast, as I have mentioned on my schiacciatta just two weeks back about my yeast baking classes, I passed my primary course of yeast. So when I had one whole lot of members pounce on me for garlic cheese rolls, I started feeling nostalgic. Though now I know if we have pulled off one yeast thingy, it becomes an art rather than baking itself. We have to create. Yes C.R.E.A.T.E !!
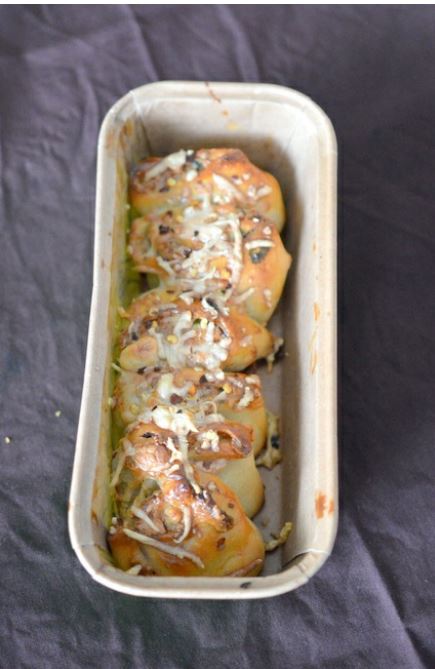
To me it looks a bit unfair while we have just finished schiacciatta couple of weeks back and what we are to do today is totally similar to that. But I thought more than to show you all how to pull of garlic rolls, I thought I should also show you what you should really do when the savory craving strikes. And that is the surprise element. So lets not wait anymore
Ingredients:
For the dough:
- All-purpose flour – 3 cups, extra for dusting
- Salt – 1 teaspoon
- Sugar – 2 tablespoon
- 2/18Active dry yeast/Instant Dry yeast – 1 tablespoon
- Luke warm water – 1 cup, adjust
- Olive oil – 2 tablespoon
To brush:
- Butter – 30 gms, melted
- Egg – 1, beaten well
- Oil – 2 tablespoons
For filling:
- Processed cheese ( cheddar/ mozzarella) – 100 gms
- Garlic – 2 large pods, grated
- Green chillies – 1 large, finely chopped
- Corriander leaves – 2 tablespoon, finely chopped
- Mixed Italian spices – 2 teaspoons
- Salt – 1/4 teaspoon, adjust
- Pepper – 1/4 teaspoon, adjust
- Chilly flakes – 1/2 teaspoon
Method:
1. In a bowl, add sugar and luke warm water ( To test the temperature of water, you need to warm it up and put one of your finger into it and count till 5, if the 5th count is the hottest point for you to bear the heat, then its right for yeast. If its easy for you to bear or the reverse, try and get the right temperature). Add yeast into it, mix well and set aside. Do not be tempted to disturb the mixture. It will foam up and bubble. Wait for 10 minutes for the yeast to react. If your yeast wont react, discard and start over.

2. In another large bowl, add flour, salt and olive oil. Mix well. Make a well in the center of the flour mixture and add the yeast mixture into it. Mix everything together again. If the dough is not very soft, add about a tablespoon of water at a time and make sure your dough becomes soft and sticky. This part of additional water cannot be pre- determined by any recipe. It could depend on your climate, warmth of your hands and few other factors. But the point is, a soft sticky dough can be worked up to firmness, but a hard dough is difficult to get it pliable. Hard dough yields hard breads. Soft sticky dough usually yields soft breads/buns.

3. Transfer dough onto your work counter or silicon mat. Start kneading. Best way to knead bread dough is to stretch and fold. We are trying to form gluten in the dough. And this process by all means creates gluten in the dough scientifically, it also in the same scientific terms burns out our calories. So trust me, it is such a meditative process for the yeast lovers. Mark your timer and work out for 10 to 15 minutes. Stretch the dough with one of your hand, far apart from you as much as you can stretch it. Then fold and bring it back. Stretch it back again to the extent possible. Fold it back again. Keep doing it. You will find the sticky dough transform into a smooth shiny dough.extent possible. Fold it back again. Keep doing it. You will find the sticky dough transform into a smooth shiny dough.

4. With the soft dough, make a ball with all the seams sealed at the bottom of the dough. Cover it with a bowl and let it prove for about an hour until the dough doubles in volume.

5. Punch the dough/ Knock it down are the terms. And yes you literally have to punch it down ( screeeeaaaammmm!!! Such broad fingers I have!!!! :/ )
Ok now guess what is the second picture thats on the right side?? Fine, come with me!!

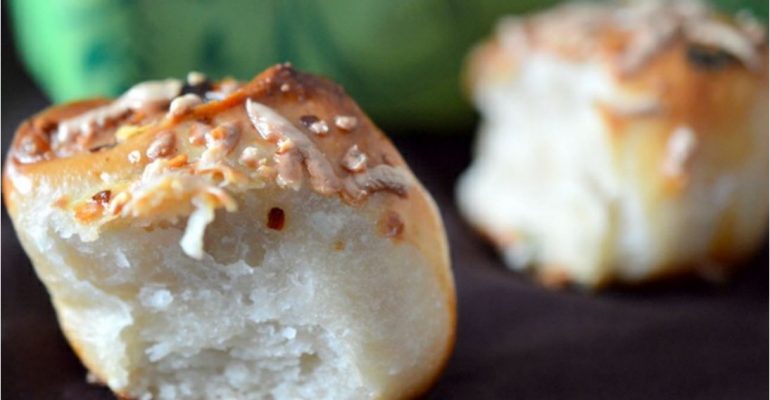
6. Garlic Cheese Rolls – Yes we did divide that dough into 5 portions. To one portion of the dough, knead it a little and roll it on your counter using your rolling pin into a rectangle that is quarter of an inch thick. Brush with melted butter and sprinkle with grated cheese, garlic, spices, pepper, salt, corriander leaves, chopped green chillies. At this point you can fill it with anything of your choice.

Start rolling from the longer side, making sure the filling is properly sealed in every roll. Seal the final edges with some milk. Pinch it with your fingers. Cut the roll into 6 to 8 pieces. Pick them carefully and place them in your baking tray/cupcake moulds/loaf pan, any one of your choice. Let it prove again for 15 to 20 minutes until it is slightly bigger in size.

Tada!!!!
7. Spicy Heart Roll – Dang, not just garlic cheese rolls, there is this one too for ya!!

To second portion of the dough that you divided, add a teaspoon of mixed italian spices. I used the pack I got with dominos pizza. Yumm.. Knead the dough completely with the spices. Make a sausage that is 8 inches long roughly and then start curling them from either side to meet the center resembling a heart. Here you have to get creative and come up with different shape ideas. ‘S’, ‘C’, ‘e’ and there are quite a lot of ways you can twist and turn them and wake up that kid in you, now!!

Transfer to your baking tray lined with butter paper or silicon mat. Let it prove for 10 to 15 minutes.Transfer to your baking tray lined with butter paper or silicon mat. Let it prove for 10 to 15 minutes.
8. Minced Meat Stuffed Bun – So by now the picture is getting a bit clear ? How many more are we expecting out of this? We are in number three!!

Roll out the 3rd portion of the dough into a circle that is half an inch thickness. Sprinkle the top with finely chopped onions, de-seeded, finely chopped tomatoes, salt, pepper, mixed italian spices, cooked minced meat. Here it is ideal to cook minced meat with your regular recipe and spices and then fill the dough with it. Gather the sides of the dough to the center on the top. Pinch it firmly. Use milk to seal, if pinching doesn’t seal it well. Invert it so the seam goes to the bottom.

Let it prove on your baking tray for 10 to 15 minutes.
9. Plain Bun Number 4 !! – To the 4th portion of the dough, bring all seams to one side and place the seam end to the bottom and make a nice ball out of it.

10. Pizza Flower Bun – Enough or not?!?
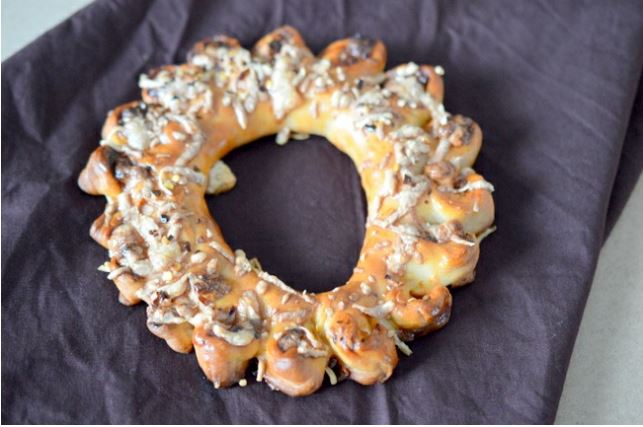
To the final and 5th portion of the dough, roll it to a rectangle which is long enough. Spread out a tablespoon of home made or store bought pizza sauce. Top it with 50 grams of grated cheese. Any topping of your choice. Bell peppers, Jalapeños, Olives, Paneer, Chicken etc. Top again with cheese and italian spices. Roll it out from the longer size. Bring the two sides of the rolled sausage together. Seal the sides nicely by brushing with some milk and pinching it with hands firmly.

Now cut 2/3rds from outside of the ring using a sharp knife, leaving the center of the ring intact. Cut out on the entire circumference. Now pick and turn every cut out piece by 90 degrees and form the petals of the flower :). Open out ever petal.
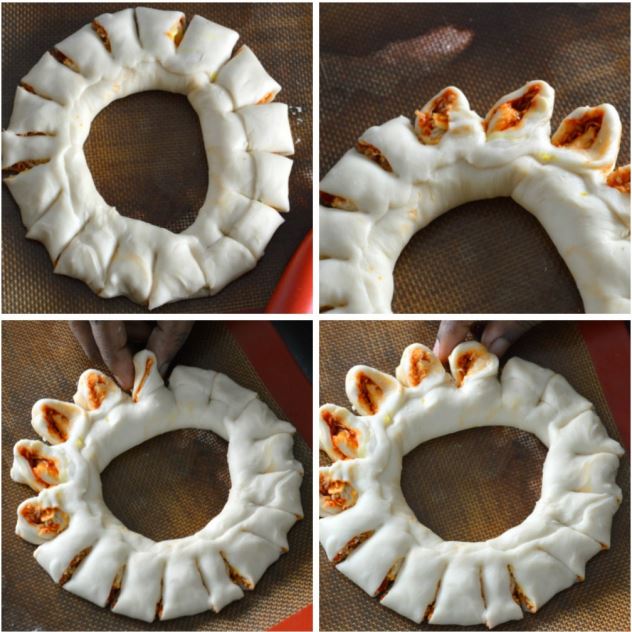
Let it prove on your baking tray for 10 to 15 minutes.
11. Now place all your creations in the baking tray. Brush it with egg. You can do milk wash also. Egg wash has to be very soft without disturbing the proven dough. That is not to deflate the dough that has increased its size by now. Sprinkle some more cheese on top and some spices/chilly flakes depending on choice. Bake in pre-heated oven at 200 degree C for 25 to 35 minutes. Timing seems more, because we are baking more than one dish in the same tray. Once the buns/rolls are golden brown, take it out of oven, place them on wire rack and brush it with oil immediately while it is hot. Brushing oil while hot will soften the crust.

I might have not given you clear measurements on how to fill the rest of 4 variations, because you really dont need a proper guideline for that. It depends on your taste buds and that of your family’s. You can fill it with hundreds of different things and call it with different names. The point I really wanted to insist here is, one dough you are happy with, you don’t have to stop your creative minds on what you have to serve yourself with. You can end up even spreading with the chutney you are left over from your breakfast, and yes some cheese, spices, chilly flakes will do the magic. I agree working with yeast is not just this much. There are quite a lot of things and that is one whole subject to master. But to make it work for your savory buds, you don’t have to wait, and that’s a fact.
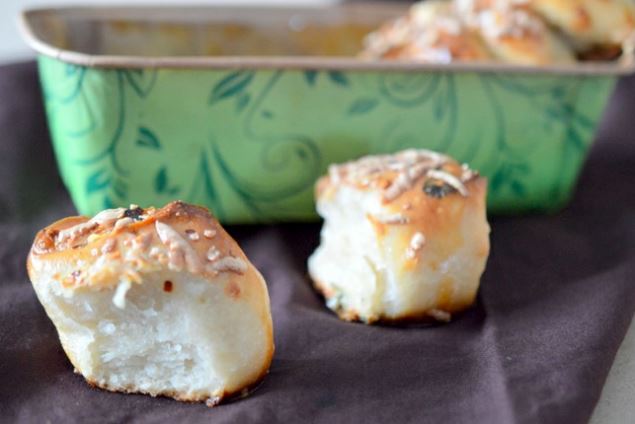
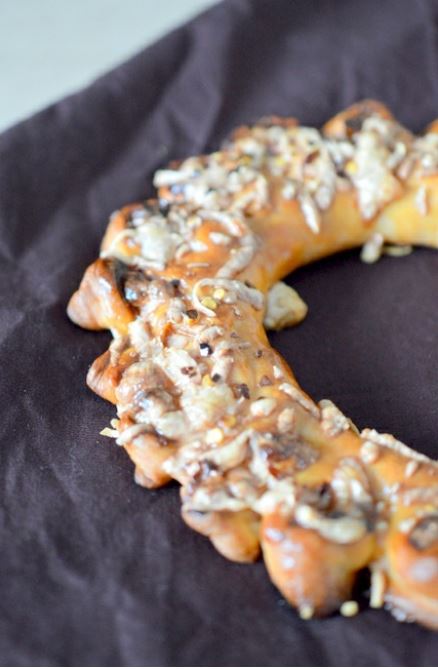
Did I really surprise you ? .. But I swear I was literally surprised
This has been baked for Fondbites, Bake Along, a group of enthusiastic bakers, bake one recipe every week along with me. To join the group, send a join request in the facebook group and I will add you to the group.
Recipes of previous Bake Along can be viewed here Members – Once after you finish baking, post the link of your finished picture below using the linky tool.


