Bake Along #22 – Vanilla Cream, Vanilla Glaze & Sugar Doughnuts
February 13, 2020 2021-09-04 18:20Bake Along #22 – Vanilla Cream, Vanilla Glaze & Sugar Doughnuts

Bake Along #22 – Vanilla Cream, Vanilla Glaze & Sugar Doughnuts
I have attempted doughnuts earlier and I was pretty happy with the results. Yet the cream filled doughnuts used to fascinate me every time I buy and taste them. One of many recipes that I needed a hang on and this was certainly one of it. And by now you would have noticed I managed to get 3 types, yes! vanilla cream filled doughnuts, sugar doughnuts and vanilla glazed doughnuts.
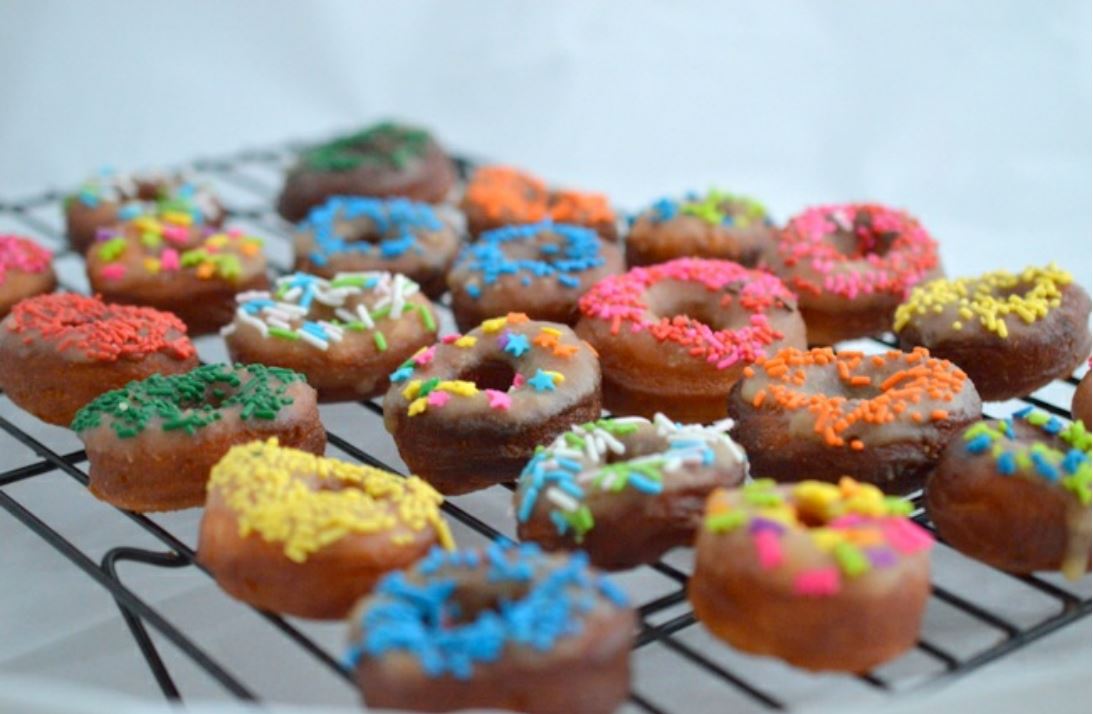
Chocolate glaze seemed simple enough and that’s the most common one, so I thought why not try vanilla glaze here. I was excited when I saw this glaze recipe, which just pulled me into it.
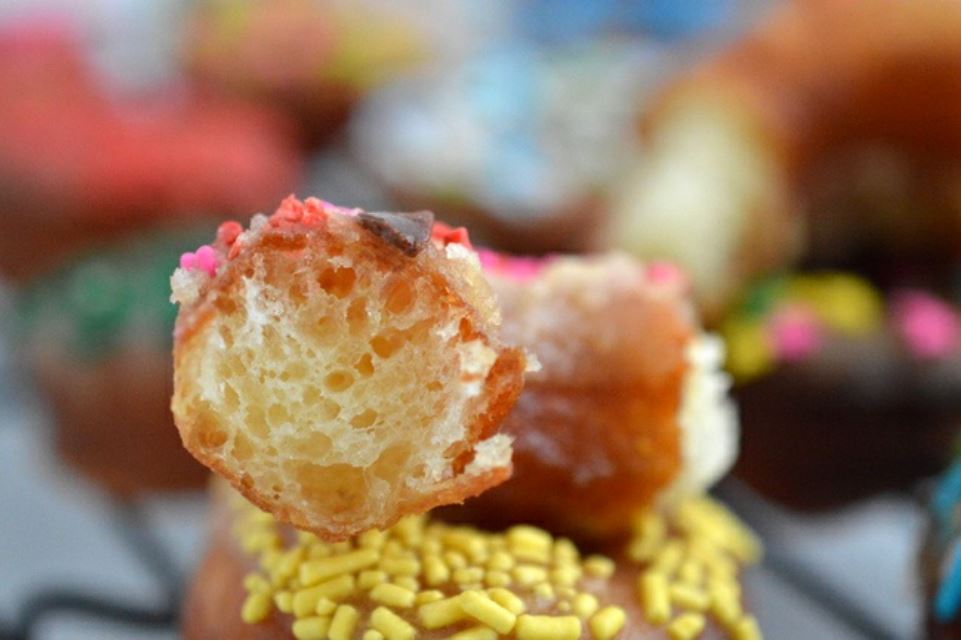
But the best moment was when I finished filling a sugar coated doughnut with vanilla cream and biting into it. It sure was H-E-A-V-E-N!!. You got to experience it. Indulge!
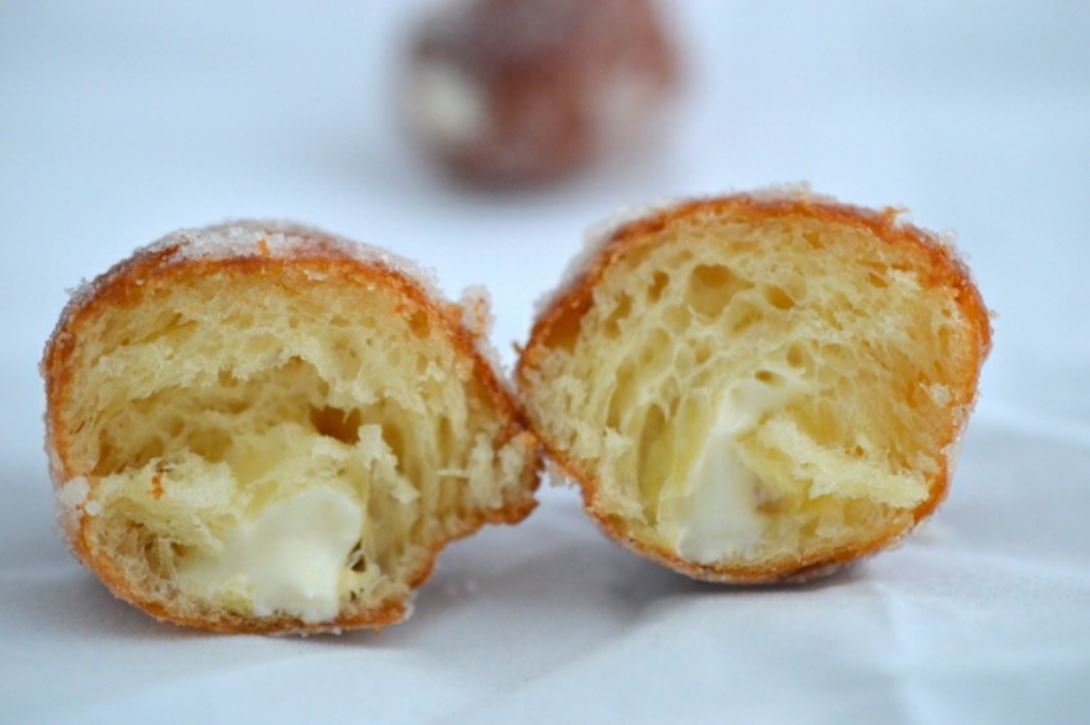
Did you look at that !! So you now get what am talking about ? :P. To tell you about the texture, it had a very thin crust and a very very soft inside. And I bet you make these now, you wouldn’t want to buy it out anytime after. Amazing texture compared to any of my previous attempts and am really glad I stuck to this recipe. I tried and made different sprinkles on the vanilla glazed doughnuts and I bet you can’t sell it better?
Ingredients:
Recipe inspired from: Brown Eyed Baker
Glaze inspired from: Allrecipes
Dough:
- Active dry yeast or Instant dry yeast – 2½ teaspoons
- Milk – 2/3 cups, Luke warm
- All-purpose flour – 3½ cups, sifted
- Granulated sugar – 1/3 cup
- Salt – 2 teaspoons
- Eggs – 3
- Unsalted butter – 100 gms, at room temperature
Vanilla Cream:
- Vanilla Pastry Custard – 1/2 cup, use this recipe or make from ready packets
- Fresh whipping cream – 1/2 cup
Vanilla Glaze:
- Butter – 1/4 cup
- Icing Sugar – 3/4 cup
- Pure vanilla extract – 1/2 teaspoon
- Hot water – 2 tablespoons or as needed
To coat:
- Caster sugar* – 1/2 cup
- * Process regular granulated white sugar in your food processor and us To fry:
- Cooking oil – 2 cups
Method:
For the glaze:
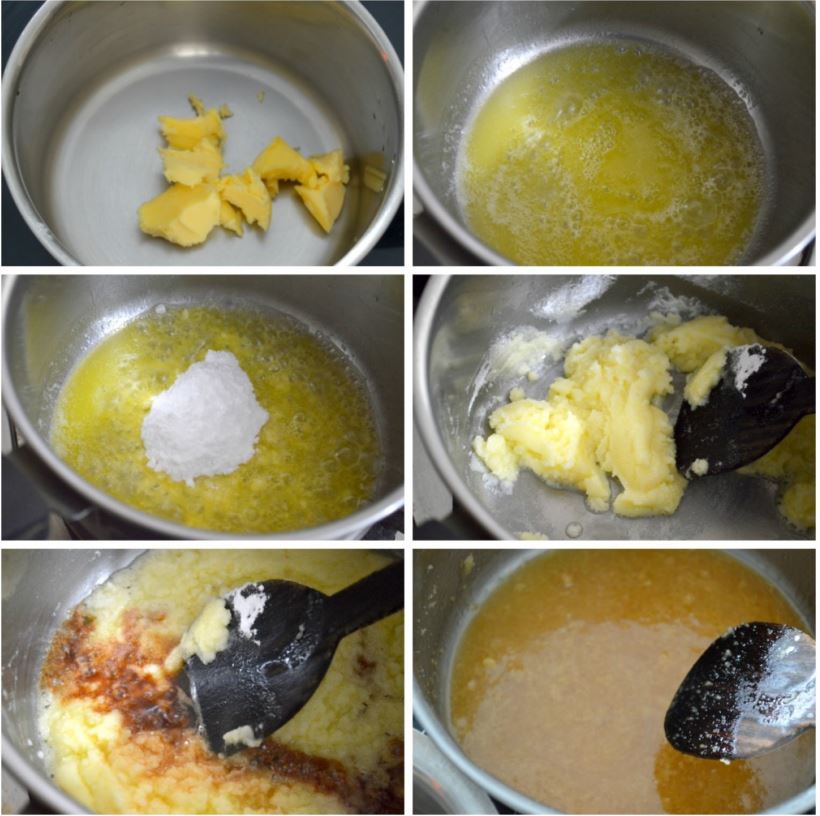
Add butter in a heavy bottomed sauce pan and heat it up on stove top. Once it has melted completely, add the icing sugar and mix it well. It will seem to solidify in the beginning but the sugar will melt. Now add pure vanilla extract and mix it constantly for 30 seconds to 1 minute on medium low flame and remove from stove. Add the hot water a tablespoon at a time and mix well without any lumps. Set aside to cool.
Dough:
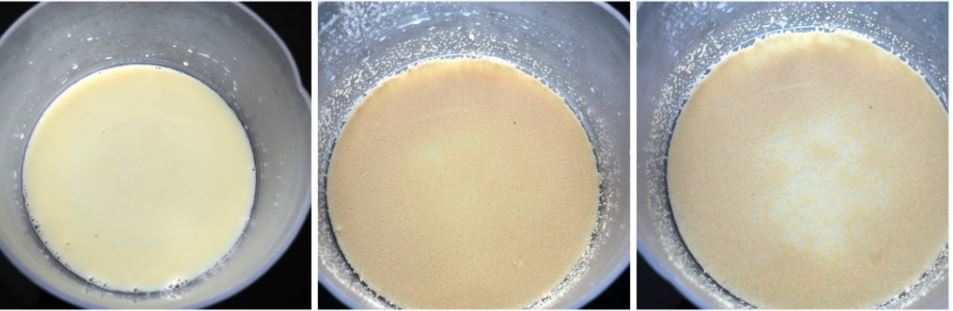
1. Check if milk is lukewarm ( if milk is hot, your yeast will die, if its room temperature yeast wont react, so its very important that your milk is at the right temperature. A quick test is to put one of your finger into the warm milk and count to 5 and if the 5th count is the maximum bearable heat, then your milk is at the right temperature). Add sugar and salt into milk, stir quickly to dissolve. Now add yeast and mix it well and let it aside for 10 minutes for the yeast to react. ( If you are using instant yeast, you dont have to do this step, you can add all the ingredients together and proceed to step 2. If using active yeast, this step is essential). If your yeast doesn’t react, which is, if it does not foam up or bubble, it is good to discard that batch and try again probably with all conditions met.
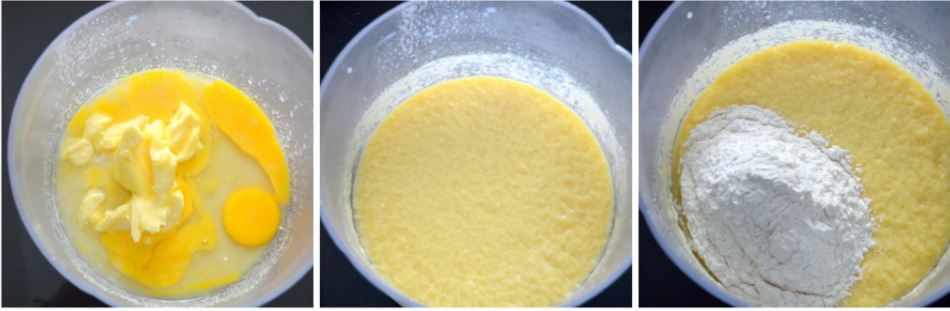
2. Add butter and eggs to the yeast mixture and beat well for about 2 minutes on medium high speed until the mixture combines well. Its ok if it curdles up a bit. Now add the sifted flour 1/2 cup at a time and beat well until all the flour has been incorporated.
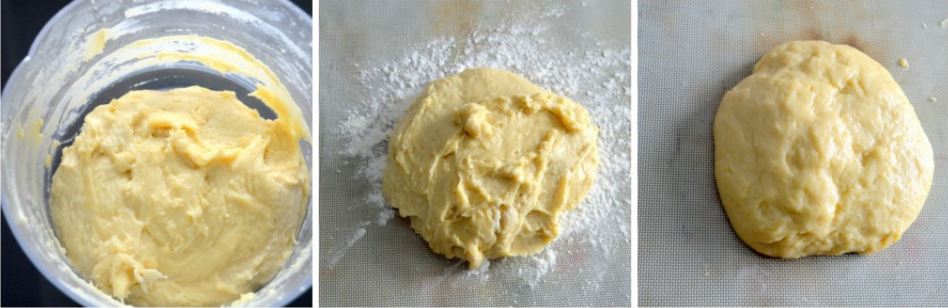
3. Its a sticky mixture do not be tempted to add more flour here. Flour your counter/workspace with 1/4 cup flour and transfer the dough onto your counter and start kneading. It is a sticky dough but work with it. You can slightly touch your hands with some flour but not too much. Keep kneading for 10 minutes until the dough becomes smooth. Try to stretch the dough as much possible while kneading.
4. Transfer the dough to an oiled bowl and coat the dough with oil on all sides. Cover the bowl with damp cloth and set aside for 1 hour to prove. The dough will double in size.
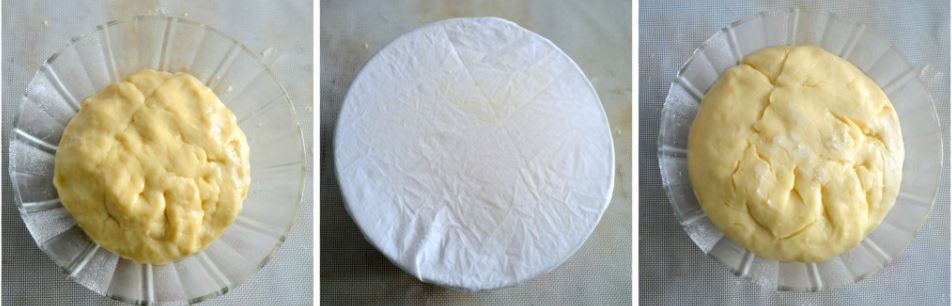
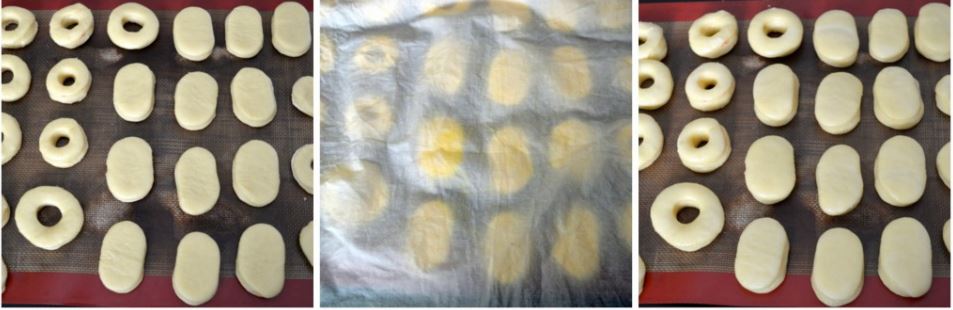
5. Punch the dough to let the air escape. Transfer the dough back to your counter and knead again for a minute. Flour your counter and roll out the dough to 1/2 cm thickness.

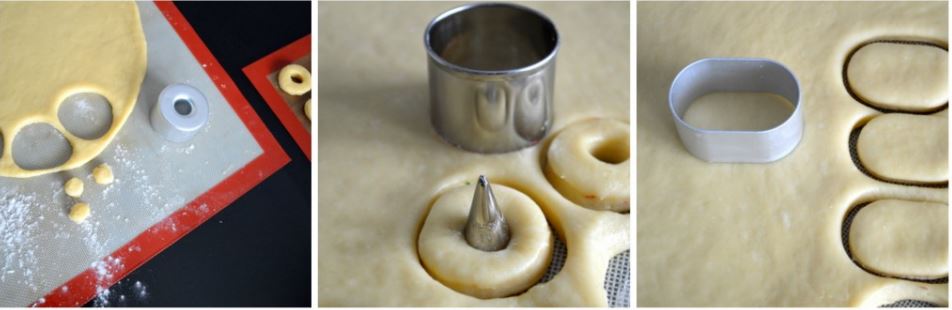
6. I cut the doughnuts in 3 ways as shown here. I used a doughnut cutter, simple and easy. Those who dont have doughnut cutter, dont worry, cut it out using a bigger round cutter and then cut out the center with another small round cutter :), easy again. But these ring shaped doughnuts cannot be filled, so am using cookie cutters to cut them any shape, so its easy to fill up. You can use normal round cutters as well, heart, oval etc.
7. Gently transfer the cut doughnuts onto a plate/counter and cover it with the same damp cloth you used to cover the bowl. Reason being, it will be less damp or your doughnut tops might stick to the cloth. Let it prove again for 30 minutes to 45 minutes until it has increased a bit in size. They are ready to be fried. Yeah I fried them, its good to indulge once in a while
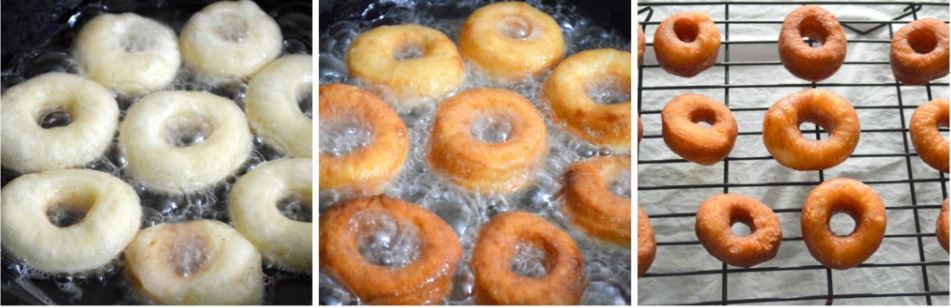
8. Heat up your frying pan with oil. Once it has heated up well, very gently pick the doughnuts and drop them carefully into the hot oil. Do not press the doughnuts hard while picking in your hand. I hold my breath while I do this, because if you deflate the proved doughnuts, you might end up with tougher texture. You can add as many doughnuts your pan can accommodate. Let fry on one side for 30 seconds on medium high flame. Flip over the doughnuts and again let it fry for another 30 seconds. Check for the colour, they should be light golden brown. Do not let them fry longer, or you might lose its texture. Take them out of the frying pan and cool on wire rack. You can also choose to lay them over tissue papers to absorb oil.
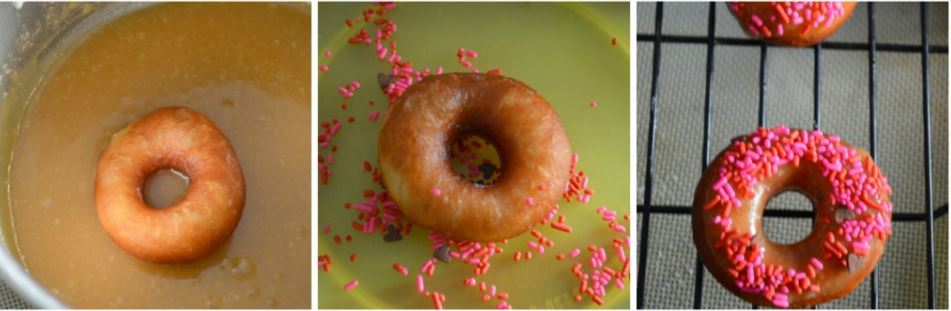
9. To glaze: Check your glaze again, if it has hardened up, add another tablespoon of hot water and mix it up again. Now dip one side of the doughnut into the glaze and immediately touch it onto a plate of sprinkles and invert it back on a wire rack or plate to set.
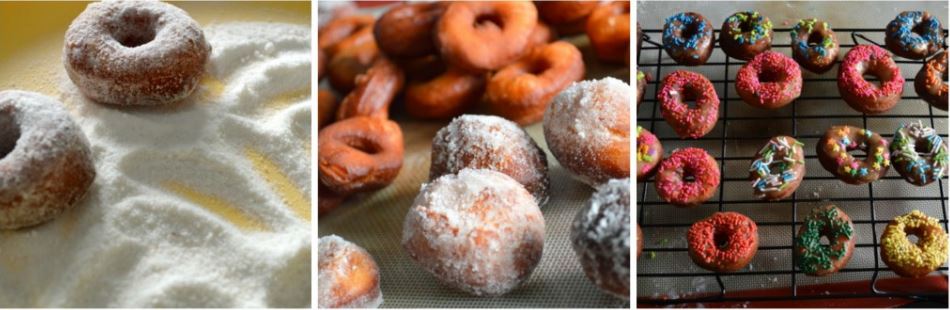
10. Sugar & filled Doughnuts: For the sugar doughnuts, place the caster sugar on a plate and then coat the doughnuts on all sides. Also for doughnuts that needs to be filled with the vanilla cream, again coat them all with caster sugar and let aside. Finish off those doughnuts which needs vanilla glaze.
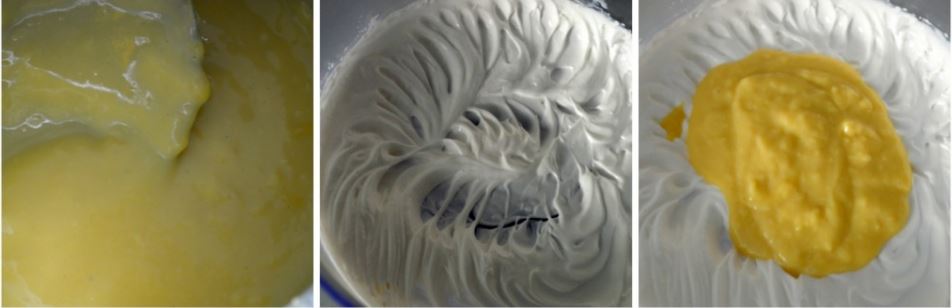
11. Whip your fresh cream until soft peaks, and add the custard and whip again until smooth, creamy and shows clear beater marks.
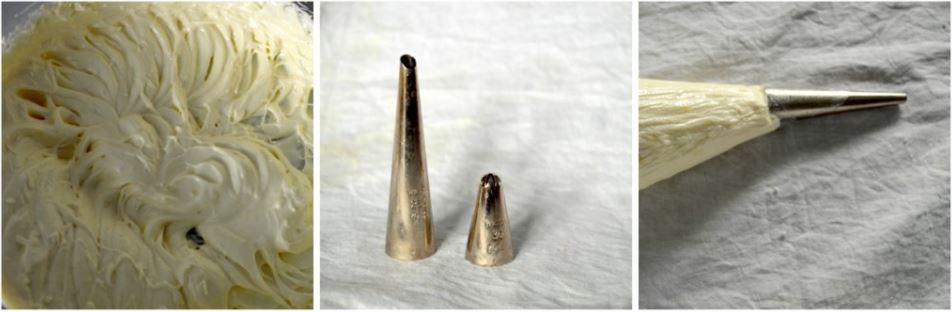
12. I used a filling nozzle, here is the picture to show you all the size difference between a normal piping nozzle and the filling nozzle. If you do not have one, you can use any available round nozzle. Fit a piping bag with the nozzle and fill it up with the vanilla cream.
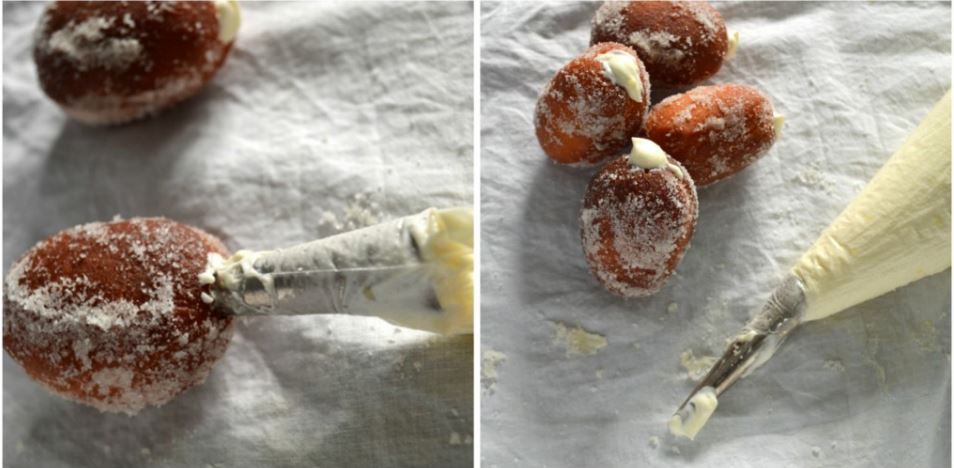
13. Inject the tip of the nozzle into the doughnut that has to be filled and then squeeze out the cream while slowly pulling the piping bag outside and keep squeezing as you move out and stop squeezing when the nozzle is fully out of the doughnut. The excess cream can be wiped off using your fingers or any spoon. Fill up as many doughnuts as you want.
They are great to be served immediately after they are made, or the same day. You can refrigerate for 2 to 3 days and warm them in microwave for a minute or two and serve. You can freeze them for longer.
These are best sellers in any bake sale/ canteens, take a bite you will know why. One of the best textured doughnut and more than all that, umpteen satisfaction of accomplishment. It was a mere dream come true for me, and I wish it happens to many others too
This has been baked for Fondbites, Bake Along, a group of enthusiastic bakers, bake one recipe every week along with me. To join the group, send a join request in the facebook group and I will send you a confirmation message, after you confirm that you will bake every recipe with me each week, I will add you to the group.
Recipes of previous Bake Along can be viewed here
Members – Once after you finish baking, post the link of your finished picture below using the linky tool.