Bake Along #31 – Onion Tomato Schiacciata
February 20, 2020 2021-09-04 18:17Bake Along #31 – Onion Tomato Schiacciata
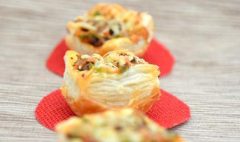
Come on, say it with me, Skietch-ATTA. Ok, lets start from here, say again Sketch-Atta. Now a slight twist with the ‘e’, but we are not dragging, real quick. Again Skietch-Atta. Oh yeah! thats it . That’s how easy it is to pronounce Schiacciata. So today we are making Onion tomato Schiacciata!!
This week I decided to give tribute to one of the awesome teachers I have come across and someone whom I still consider an inspiration, Lisa Isaac of Artisan’s Institute of Baking. A place in Chennai where any beginner will look out for beginning a baking career. I also had aspired to do that when I began, but unfortunately owing to time constraints I was unable to get to her and learn how to do basic baking. But the thirst for learning from her just continued ever after but I crossed the stage of doing basic baking by the time I could make it. So I decided to take up ‘Continental Baking’ course with her. It was a 2 day course and it was absolute bliss. She calls it an institute and that’s how exactly it was. A whole table to own with every single thing individually kept for you, even onions and tomatoes. We did different styles, starting from lasagne, moussaka to tacos and empanadas. One thing I really like about her classes is completely organized, zero chaos, individual hands-on, reinforcing basic knowledge with practical teaching. That’s where I got inspired from and am still in the process of getting to the matured way of handling such professional way of teaching. I need that time and experience but I want to do justice and that simply became my motto.
Later when yeast was not getting friendly with me unlike cakes, with a lot of effort from my side, I thought that is another opportunity to visit Lisa Mam and that is another fascinating experience. Every bit of the 2 day session was surprising with lot of info and knowledge. I had to really take notes, take pictures and understand stuffs. Gluten formation was shown. Names of dishes were totally new. I was like, Oh my god, this is the one!!. I was 100% satisfied with the yeast knowledge I got there and I really wish to share all the excitement I had there, but probably not all. But I could share with you all one of the dishes I learnt there. No, but not the recipe which was made in the class. I went ahead and found out a recipe that is very close to what was taught in the class. and to those who are really interested to beat the beast, this is one place I would recommend !!
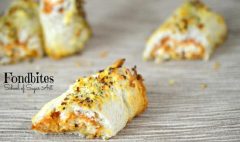
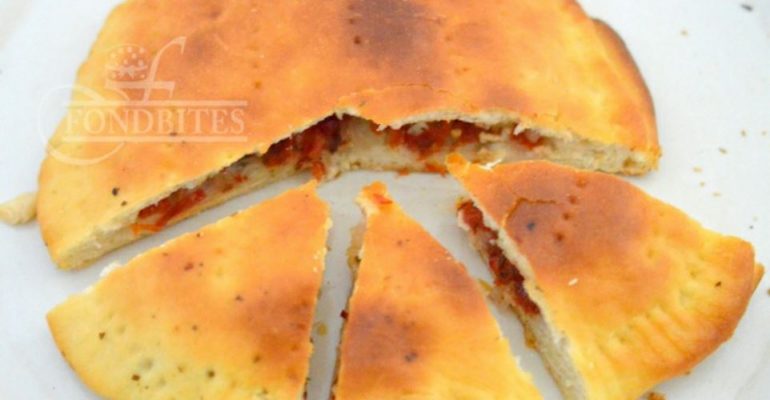
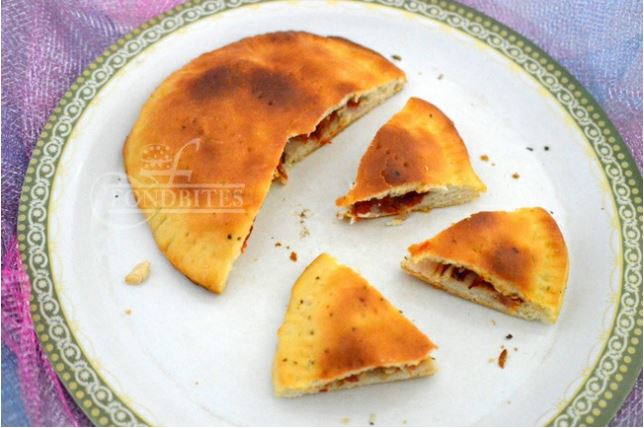
Schiacciata is a flat bread that can be baked without any filling, or a savory filling of choice and could be a sweet version too. We were taught an onion tomato schiacciata in the class and I wanted to replicate that simple yet flavourful dish and share that excitement with you all. You can choose to make the filling as brilliant as you can. Pizza/pasta sauce, cheese, chicken/meat, paneer/mushroom, any vegetable of choice with seasoning and spices of your liking
Ingredients:
Recipe inspired from: citronetvanille
- Instant dry yeast/ Active dry yeast – 2 teaspoons
- Water – 100 ml to 150 ml, adjust
- Sugar – 1 tablespoon
- Salt – 1/2 teaspoon
- All-purpose flour – 250 gms, extra for dusting
- Olive oil – 30 ml, extra for basting
- Milk – 3 tablespoons, for brushing
- Milk – 1/2 cup, at room temperature
Filling:
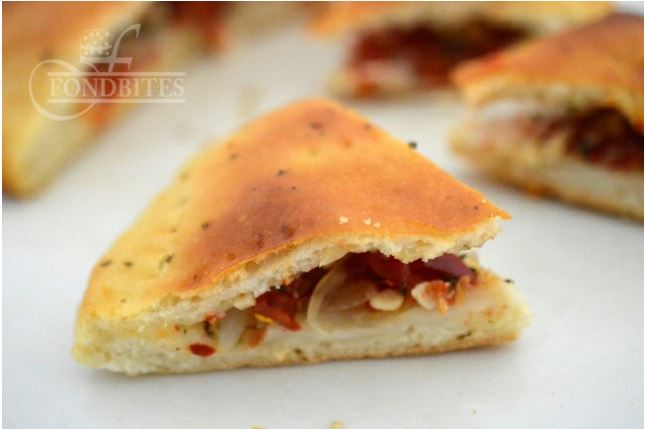
- Onion – 1 large, thinly sliced
- Tomato – 1 large, de-seeded and thinly sliced
- Garlic pod – 1, chopped finely
- 3/10Chilly flakes – 1 teaspoon
- Salt – 1/2 teaspoon
- Pepper powder – 1/2 teaspoon
- All-spice – 1/2 teaspoon, or any spice combination as per your liking
Method:
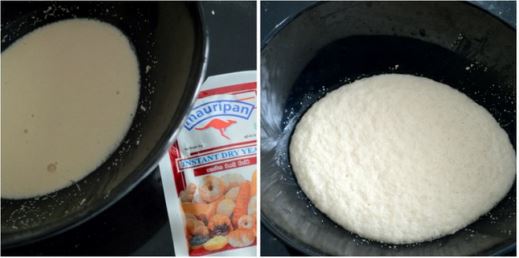
1. Take 1/4 cup of water and heat it up to lukewarm. Lukewarm in simple terms to work in home is to put one of your finger into the warm water and count till 5. If the 5th count is the final moment of bearing that heat, then you are good to go. Hotter than that will kill your yeast, colder than that will not kick start your yeast to react.
To the luke warm water, add sugar and yeast and mix it well. Set it aside and do not disturb for 5 to 10 minutes until it will start to bubble up and become frothy. Those using instant yeast could skip this step and add the yeast to the flour along with sugar, salt and oil and start adding lukewarm water and begin making your dough. I used instant yeast but I like how the yeast froths and also I thought it will be good to show those using dry yeast to see how the foaming happens. If your yeast wont react, do discard and start again.
2. In a large bowl add flour and salt and mix well. Add oil and use your fingertips to combine oil and flour mixture. Make a well in the center and pour the yeast mixture into the well. Add remaining water from the measurement little by little until the dough becomes soft and sticky. Not too wet and not dry and hard. It is not easy to tell you the exact water measurement, because moisture that is needed differs due to various causes. The key here is to add between 100 ml to 150 ml in total and get a sticky soft dough.
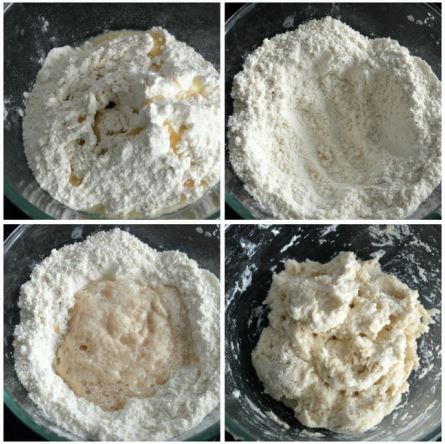
3. Transfer the dough onto your counter top that is cleaned well. Or use a silicon mat like I do. But working on silicon mat is not very easy to understand the kneading process. Ideally for gluten to form at this stage, the dough gets a stretch and fold kneading. So stretch the dough extending your hands to maximum possible extent, then fold the dough and bring it back, repeat. If its sticky, sprinkle very little flour and do the stretch and knead process. If it is not soft, sprinkle some water and repeat kneading. It is this stretch and knead that makes the dough smooth and silky and helps in gluten formation. So stretch and fold, stretch and fold for 10 minutes. Yeah! have a timer. I bet this is such a lovely workout and the only one I have . If your dough wont become shiny in 10 minutes knead for a little longer. Idea is to get a shiny smooth surfaced dough.
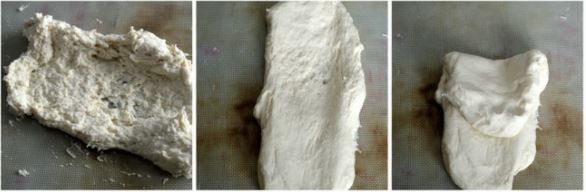
4. Once the dough kneading is done, use a bowl to cover the dough and let it for proving for about 30 to 45 minutes until the dough becomes double in volume. You cannot leave them for hours together, because over proved dough is also not a good sign in yeast baking. If you are running out of time, you can transfer dough in a bowl, wrap it with a dampen cloth and pop in refrigerator until you get back to finishing your baking. It can prove slowly in fridge.
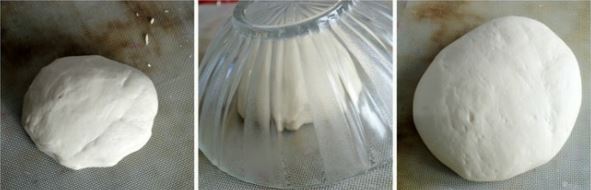
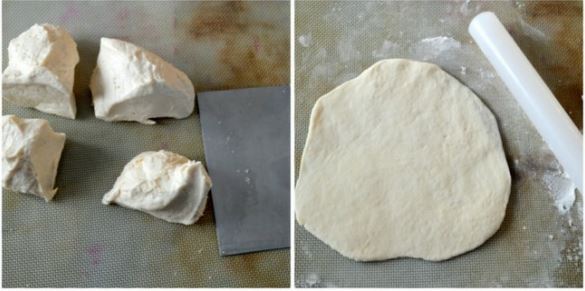
5. Knock or punch it down is the term used. Yes, use your fist to punch the dough, here we are releasing the air thats collected in the proved dough. Knock down throughout and combine the dough, give it slight kneading and now you are ready to go.
6. I decided to make 2 medium sized schiacciatas, so I divided the dough into 4 pieces. You can also make one big and you can divide into 2. Slightly flour your counter, take one portion of dough, roughly flatten it and roll it with your rolling pin to round shape about quarter of an inch thickness.
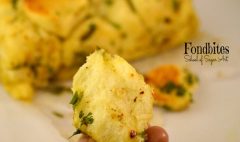
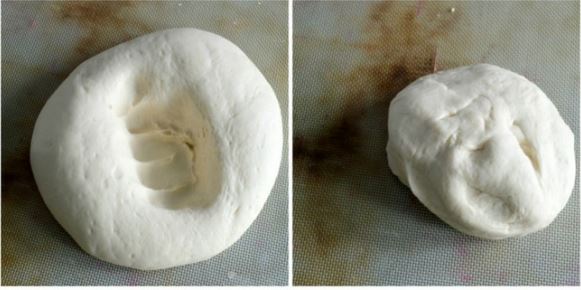
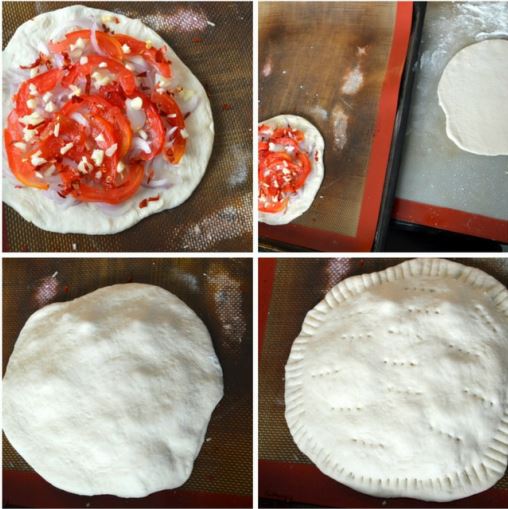
7. Transfer the rolled dough to your baking tray that has been lined with parchment paper of silicon mat. Spread over sliced onions, tomatoes, garlic, chilli flakes, salt, pepper and spices. Here you got to adjust to your taste buds. Sprinkle any cheese, spread over some sauce. Now take another portion of the dough and again flour your counter and roll it to round of a size little bigger than your first. Brush the sides of the first dough with milk and place the second rolled dough over the first. Seal the sides with your fingers first and use a fork to mark lines and seal it completely. Now use the fork to poke holes on top. This is done to let vapour release out during baking, so your sides wont split open. Let this prove again for 10 to 15 minutes to just increase a little in size. This stage is second proving and this is when 90% of the size of your yeasted dish will take up. Baking only cooks them, most of the rising bit happens outside of oven
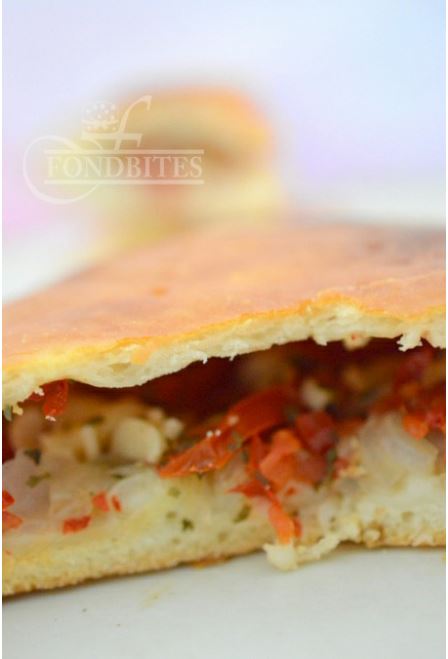
8. Now brush the top with milk. This is another critical phase. Brushing needs to be done like using a peacock feather on a burnt skin . No, but am serious , that gentle, because the dough was let to prove for second time, and the size it has taken should not be deflated by this brushing process. So gently and slowly brush the milk. Bake in pre-heated oven at 200 degrees, for 17 to 20 minutes until the top turns golden brown. To one of the portion I sprinkled some spices on top also, just to see how it is. Once the schiacciata is out of the oven, immediately brush oil all over. Now you can be a little less gentle. This is called basting of oil and that helps keep it soft once cooled down. Once basting is done and you are able to bear the heat, remove from the baking tray to a cooling rack else the bottom will soak up moisture. You are ready to slice and eat while its warm.
You can store in refrigerator for a day or 2 and could re heat it before serving. Best to make it for a single meal serving. This is a no fail dish basically because it is a flat bread and you wont go wrong anywhere and nothing is any tricky if the key steps are followed as given in the recipe. Enjoy!! have a sugar free week :P, oh but this one has a tablespoon !! Definitely forgiveable. Aren’t they?
This has been baked for Fondbites, Bake Along, a group of enthusiastic bakers, bake one recipe every week along with me. To join the group, send a join request in the facebook group and I will add you to the group.
Recipes of previous Bake Along can be viewed here
Members – Once after you finish baking, post the link of your finished picture below using the linky tool.